Fox's Fast and Easy Tail Wheel Endorsement

Tail Wheel Training day 1

tailwheel training

CoronaVirus Protocol

Ground Training 1: We will sit down at our runway mock up with a Citabria model and talk about the forces effecting you as a tail wheel pilot such as slipstream affect, P-Factor, gyroscopic forces and crosswinds. Some discussion items will be utilization of the brakes, and causes of some tail wheel incidents.

Flight Training 1: After our safety brief and preflight, we will have you fly from the front cockpit. All you will need to do is work on taxi, smooth brakes, takeoff, constant rate climbs and flight out to the area. In the practice area, we work on dutch roll drills, steep turns, stalls, and maybe falling leaf stalls. These maneuvers are critical to learning how to manage the rudder smoothly. We fly back, enter the pattern and introduce 3 point landings. We will demo/do full slips and turning slips. If you master the 3 point landing, we will introduce the wheel landing.

Tail Wheel Training day 2

Ground: Reviewing the proper 3 point landing techniques and aerodynamic forces is important to review every day in the beginning. Visualizing a good landing will be integral to you developing intuitive and natural landing skills. Flying with a control stick may feel a little different for some folks. We will introduce the Wheel Landing techniques, the why’s and the hows.

MontgomeryFieldweb.jpg

Flight Portion: After strapping in the front of the Citabria agiain, we will get aircraft started, work on smooth brake usage, control stick wind controls and basic taxi, takeoff and go right to pattern work. The instructor will demonstrate a wheel landing, and they you can get to work duplicating the techniques and learning the site picture and feel. We will practice full slips and turning slips to help you integrate them into your tail dragger skills tool box. As you get some experience with these landing techniques we can practice power-off landings, wheel landings and 3-point landings until you are comfortable.

Tail Wheel Training day 3

Ground: We will focus on any weaker areas and review all the forces at work on the aircraft, you will be able to relate better after two days of experiencing them.

Flight Portion: You will get aircraft started, do your checklists, taxi, takeoff and go right to pattern work. The instructor will try to not do any instruction for the first few landings, getting a feel with how you are progressing with wheel landing and 3 point landings. By this time, you will have seen all of the techniques for the tail wheel endorsement and we can just practice until you are comfortable in all tail wheel skills.
What is my Tail Wheel Training going to entail?

Tail Wheel Training day 1

tailwheeltraining.jpg

CoronaVirus Protocol

Ground Training 1: We will sit down at our runway mock up with a biplane model and talk about the forces effecting you as a tail wheel pilot such as slipstream affect, P-Factor, gyroscopic forces and crosswinds. Some discussion items will be utilization of the heel brakes, and causes of some tail wheel incidents.

Flight Training 1: After our safety brief and putting on flight gear, we will have you strap in the front cockpit. All you will need to do is work on taxi, s-turns, takeoff, constant rate climbs and flight out to the area. In the practice area, we work on dutch roll drills, steep turns, stalls, and maybe falling leaf stalls. These maneuvers are critical to learning how to manage the rudder smoothly. We fly back, enter the pattern and introduce 3 point landings. We will demo/do full slips and turning slips. If you master the 3 point landing, we will introduce the wheel landing.

The Heel Brakes are great for training.  You won’t accidentally hit the brakes while you are landing.

The Heel Brakes are great for training. You won’t accidentally hit the brakes while you are landing.

When ready to apply brakes, you can angle your feet inward at the heal and still use the rudders.

When ready to apply brakes, you can angle your feet inward at the heal and still use the rudders.

Tail Wheel Training day 2

Ground: Reviewing the proper 3 point landing techniques and aerodynamic forces is important to review every day in the beginning. Visualizing a good landing will be integral to you developing intuitive and natural landing skills. Flying with a control stick may feel a little different for some folks. We will introduce the Wheel Landing techniques, the why’s and the hows.

MontgomeryFieldweb.jpg

Flight Portion: After strapping in the front seat again, we will get aircraft started, practice heel brakes usage, s-turns and taxi, takeoff and go right to pattern work. The instructor will demonstrate a wheel landing, and they you can get to work duplicating the techniques and learning the site picture and feel. We will practice full slips and turning slips to help you integrate them into your tail dragger skills tool box. As you get some experience with these landing techniques we can practice power-off landings, wheel landings and 3-point landings until you are comfortable.

Tail Wheel Training day 3

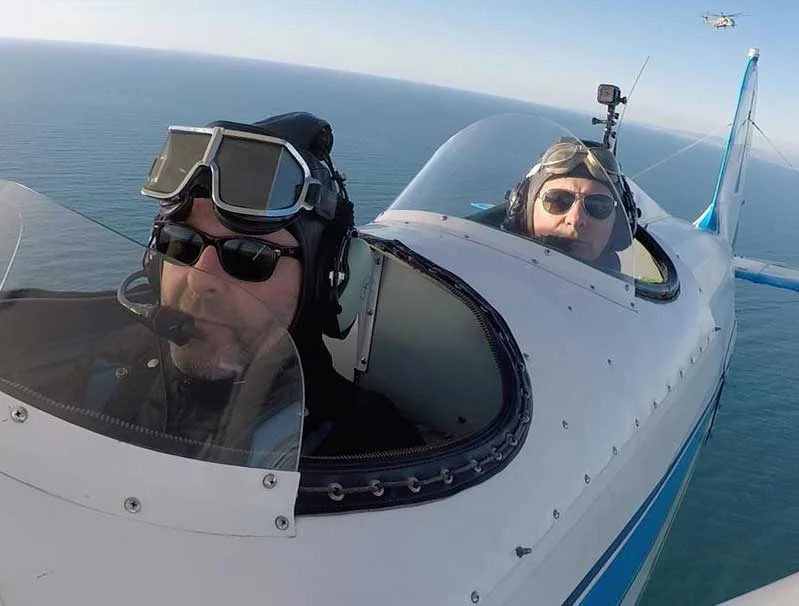
The back seat is so much fun! You will enjoy flight and landings in a way that was previously just a dream.

The back seat is so much fun! You will enjoy flight and landings in a way that was previously just a dream.

Ground: We will talk about starting techniques, radio comms, checklist usage and backseat landing techniques that are a little different from the front seat. The toughest part of this is learning the ‘hot start’ and just getting comfortable in the back seat.

Flight Portion: After strapping in the BACK SEAT, you will get aircraft started, do your checklists, s-turns and taxi, takeoff and go right to pattern work. The instructor will demonstrate the landings from the front seat, including wheel landing and 3 point landings. You will quickly get used to the new sight picture and using your peripheral vision to enhance your landings. By this time, you will have seen all of the techniques for the tail wheel endorsement and we can just practice until you are comfortable in all tail wheel skills.

The Pattern: The Best Practice for ALL of your Basic Flying Skills

Look at the MYF pattern as a laboratory to practice lots of different flying skills.   Enjoy the moments in the pattern, and most importantly smile! I find touch and go’s a very enjoyable, and rewarding experience. Flying a Cessna 172 is mechanical and sloppy but landing the Great Lakes is more like delicate and precise Stradivaria: an art form versus a science.

crosswind turn.jpg

Takeoff: Get that tail up fairly quickly, fly a smooth coordinated takeoff, use the right amount of rudder, ensure you don’t have a wing drop when you rotate. Tip: Less is more with the rudders. Keep the crosswind correction in so you don’t swerve. It is hard to say how much you need, you just need to figure it out with practice.

Crosswind: On speed (80-90 mph), climbing turn, with appropriate rudder and airspeed control. You are getting back into the swing of things after the takeoff or touch & go, don’t take it for granted. Right Rudder, Right Rudder. Get the Prop back to 2500 RPM. Fly a good jet.

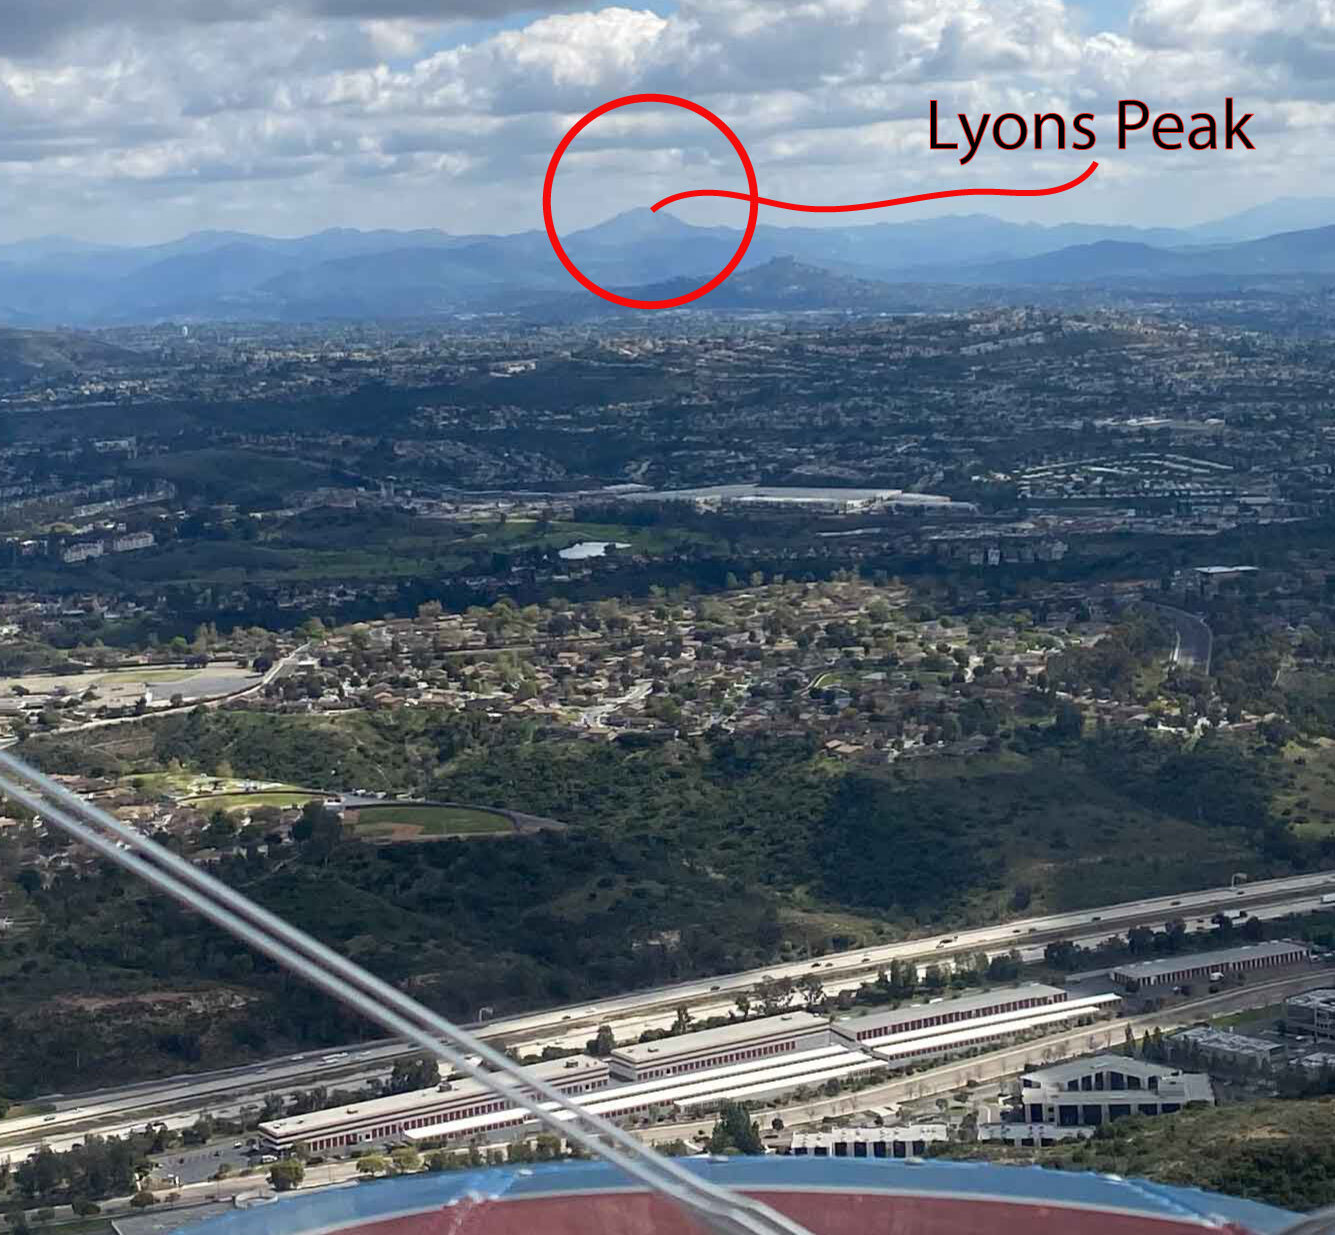
Downwind:  Improve your Situational awareness with the pattern track over ground, pay attention to airspeed control, pitch control and smoothness, balance the rudder usage. Try to keep the ground checkpoints the same every time, but adjust for winds. Use Lyon’s Peak as a reference for your downwind. Don’t get too tight or wide. Lots of stuff to practice, remember you are sharpening the sword.

LyonsPeak.jpg

Base turn:  Try to turn for a short approach. The short approach looks good, embraces your tail wheel instincts and perfects your pattern geometry.

Slips are your tailwheel tools: Turning Slips will be your most challenging skill to develop to perfection. Get that FULL RUDDER in. Rudder controls your descent rate, ailerons maintain a desired ground track and pitch controls your airspeed. Newbies accelerate to 110-120mph when they learn to slip, try to maintain 90mph.

Forward Slip is your ‘go to’ maneuver: Wing down (into the crosswind) and top rudder. This maneuver helps your visibility and gets you on the glide-slope if you are high. I love to slip so always come in high. When a new tail wheel student goes around because they are too high, I just giggle because I know they are really gonna like the slip when they figure it out.

Work on glide slope development, turning slips, pitch with smoothness and airspeed control, proper power off sight picture, ground track awareness, avoiding undershooting or over shooting final.

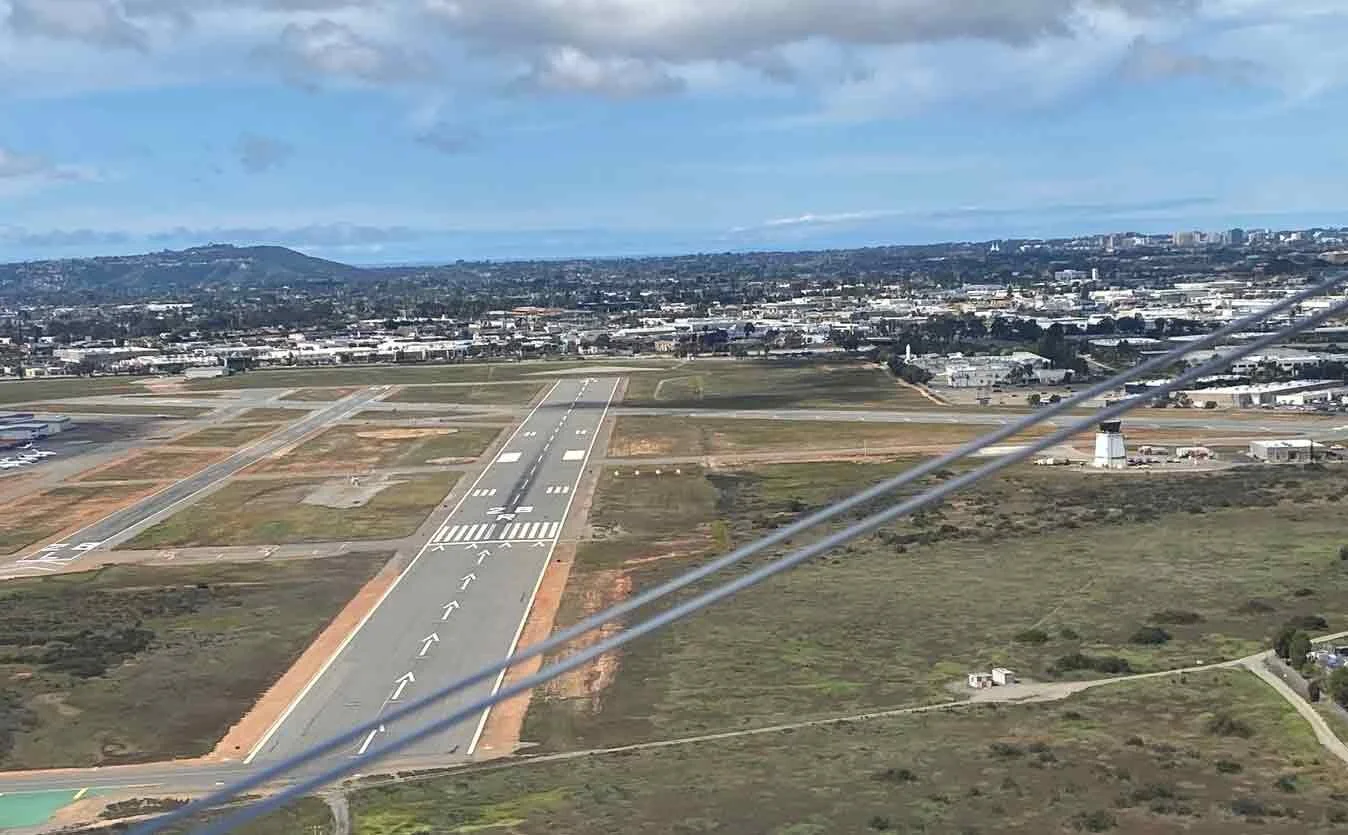
Final: Develop that glide slope visual acuity, precise airspeed control, basic runway alignment. You can’t see much so just a basic runway alignment until you are in close to landing. Focus on practicing a controlled airspeed deceleration, plan on gently touching the runway in the 3pt attitude. Perfect that crosswind correction, the skills will come in handy on a high crosswind day, train like you fight.

Don’t overshoot or undershoot final, that is sloppy airmanship.

Rollin.Final.jpg

Practice your crosswind control plan on final approach. See if your desired inputs will work. If you are being pushed left or right of final then refine your inputs. Be smooth.

Flare:  peripheral vision landing, airspeed feel, smooth pitch control, crosswind inputs, alignment of the longitudinal axis straight down the runway. In the flare, I see many new pilots drift or let the nose veer to the right. This is due to crosswind or propellor turning tendencies. Don’t let this situation take control from you. Improve your aircraft control in the flare with overall awareness and practice.

Touchdown: Roll it on! Look at infinity through the forward cockpit or ‘through’ the passengers helmet. Use your peripheral vision to manage your vertical velocity, you get used to it. If you look to the left or right around the passengers head, you will naturally put the airplane in a little side slip and start dancing on the rudders.

Work on getting to that 1-2” above the runway in a 3-point attitude and just ‘roll it on”.

The difference between a tail wheel pilot and non-tailwheel pilot is that crosswind control on final, touchdown and rollout. After touchdown, you gently increase your crosswind input as you slow. Slower speed equals less aileron authority, so you need more. When you get slow enough you can bury the aileron into the wind.

Roll out:  Perfect your peripheral vision control of the aircraft, look at infinity, use smooth rudder inputs, keeping and increasing crosswind corrections, confidence and reducing negative stress. All this will become intuitive and you will be part of a great line of tail wheel biplanes. Congratulations for your choice to improve your flying abilities. Erich

landingtechniques.jpg

Common Questions about Tail Dragger Flying and Training

Biplane training.jpg

Why should I get my Tail Wheel training and Endorsement?

Pilots can incredibly improve their stick and rudder skills by a couple tail wheel training flights. Old timer pilots first learned in tail draggers like the J3 Cub. You would be surprised how sloppy pilots can be with their crosswind control and flare since they learned in tricycle gear trainers. In your tail wheel training, you WILL get more capable and confident at crosswind corrections. Your pitch corrections with the glide slope, airspeed and flare control will get much smoother and more refined. These skills are easily transitioned to a C172, M20J, Twin or even a B-737.

How long is the training for the Tail Wheel sign-off?

I have seen talented pilots get the tail wheel sign-off in two lessons and others in maybe 8 lessons. The key to good training is understanding how the cosswind control inputs and rudder coordination work together for a consistent and smooth landing. Let us shoot for 4 lessons!

When I am signed off, will I always feel comfortable flying tail draggers?

You may have higher personal limitations, like 10 knots of crosswind and gusts, but on the normal MYF days you will feel safe and confidents in your landings. After a couple days of solo pattern flights, you may look forward to the higher crosswind days for pattern practice.

Tail Wheel flying sounds scary, I don’t want to do tail wheel training until I get hired by an airline, it my risk my perfect record.

Flying with some pilots in a Cessna with poor fundamentals is terrifying. Getting better flight training and improving your skills is just smart. As an instructor, I had a tail wheel mishap with an Air Force Academy cadet on spring break. He was a couple months from graduating and going to USAF Flight School. I was 2 weeks from starting at United Airlines. When I told the United hiring manager, he laughed at my worry and said that only the best pilots instruct in tail wheel and they are happy to have me onboard. The cadet never had an issue either with his Air Force record.

Good Comms/Patterns at Montgomery Field

Leather Helmets are critical to Good Comms

Leather Helmets are critical to Good Comms

Do you every hear the controllers get frustrated on the radio? Do they ask you to do a Full Stop instead of a Touch and Go? Good aviation communications will help you bond well with your Air Traffic Controller where ever you fly. By working towards BREVITY, the AIM verbiage, and general professionalism, you will usually get the best service from your controller.

If you are flying Biplanes, they expect you to be Top Notch on the Radio!

Radio work is not easy: old radio’s, static, newbie’s and poor English. I am always trying to follow more of the AIM, take out poor communications habits and improve my game. Let’s point out some ways we all can improve comm’s at Montgomery Field and keep our controllers happy.

MYF PATTERN Tips and Tricks:

  • think ‘Where you are, Who you are, and What you want to do’

  • Practice your comm’s at home, and say it in your head before you click the microphone switch.

  • Pause/listen when you flip the frequency before you transmit, you don’t want to block someone. This situation causes enormous risk to possibly missing a critical call.


Ground Communications

Be that Professional Aviator: Set the bar high!

Be that Professional Aviator: Set the bar high!

As biplane pilots, we try to be expeditious since we are flying quite a bit and trying to reduce wait time and fuel burn.

Gibbs ramp is an uncontrolled area, but you don’t want to block someone coming in/out from Taxiway Juliet.

PILOT: Ground Control, Great Lakes 3617L, At Gibbs, Taxi for…….., with Information Whiskey.

  • taxi for…

    • Straight out, Right Downwind Departure, Left Downwind Departure (not recommended), Right or Left Closed Traffic. Or Taxi IFR.

    • Don’t ask for a Runway unless you need one for a specific reason, such as a new tailwheel pilot wanting the wide rwy, or a formation takeoff. Twr sorts it out for their flow control needs.

    • I leave the Information “Whiskey” for last, just so they don’t forget and ask me again if I have that Information. (very common)

What do you need to repeat back? Your Call-Sign and the Runway. Taxi-way instructions and waiting for another aircraft crossing at Taxiway Hotel is not a required read back item.

Approaching the Run-up or Hold Short, switch over to the Tower Frequency. 119.2 is the normal frequency, but they have increasingly been using 125.7 for the 28R only, during busy times for dual controller ops.

When you are at the Hold Short area, don’t block other aircraft. When you let the Tower Controller know you are ready, he will assign you a sequence for takeoff. Location is not important here, some Instructor’s spend extra time training the student for pre-take verbiage and run-up. Conversely, another aircraft, like a turbine, may get priority over everyone due to their IFR slot time.

If a Tower Controller asks you to ‘Standby’ when you check in, that means they are busy and you should not read that back. Zipp it!

Pilot: Tower, Great Lakes 3617L:, Holding Short 28R, Straight Out..or Right Closed Traffic or Taxiway Delta Transition.

  • Tower knows you are ready to go, that is why you called. Lol.

  • Give them information about your departure plans, don’t make them have to ask you.

READ BACK: your Call-Sign, CLEARANCE and RUNWAY. Don’t be that pilot that just read backs their Call-sign or something unprofessional like ‘On the Go’. We know how you are excited for takeoff, but this isn’t your first or your last rodeo. Proper Example: Great Lakes 17L, Cleared for Takeoff, 28R

Pattern Comm’s

The good thing about Landing Pattern Communications is that there are only a limited number of clearances or communications we should expect. The bad thing is that our radio’s and headsets are prone to static and interference. Additionally, our tours or flight lessons are filled with conversation and training.

  • Practice a couple times before you key the microphone (including chair flying at home)

Though ‘closed pattern’ usually means you don’t need to call for Crosswind or Base Turns, the Montgomery Field pattern gets quite busy and you should be prepared to anticipate Tower Calling your Base Turn.

CrosswindTurn in close has some static from an unknown company down below.

CrosswindTurn in close has some static from an unknown company down below.

HIGH STATIC AREA: Right Crosswind turn in the NORTH PATTERN has a horrible static area. This has been identified by many local pilots for even the best quality receivers. Depending on the controller, Tower may give you a clearance during this time. You may need to clarify if you cannot interpret the call.

Pilot (abeam without a clearance) : Tower, abeam, for the option. This is only when Tower has been quiet for some time or is on a ‘land line’. Don’t bother them when they are busy on the radio.

Pilot (Read back): Great Lakes 17L, cleared for the OPTION, RWY 28R, (Sequence Number). You must say your call-sign, the Runway and the CLEARANCE. If you forget to say the Runway, Tower will call you on it and cause excessive embarrassing coms.

Short approach is a final within 400ft. Great training for Emergency Landings.

Short approach is a final within 400ft. Great training for Emergency Landings.

  • the ‘Option’ means Touch and Go, Full Stop, Stop and Go, & Low Approach

  • ‘Sequence number’ is not required BUT lets the Controller know you have the proper sequence for base turn and situational awareness in the pattern.

  • if you finished your last Touch and Go, let Tower know on the UPWIND that you are ready for a FULL STOP. This allows them to better organize their traffic flow.

After Landing: If on 28R upon landing, Tower will call you on roll-out to either HOLD SHORT 28L or Cross 28L on a certain taxi-way. As a tail dragger pilot, you may be super busy trying to control the aircraft. That is ok, pause and focus on the landing first, then either say ‘STANDBY’ or Great Lakes 3617L, Hold short 28L or Cross 28L. You need to say the Runway and clearance. This is one of the main issues we hear on the radio every day and important for our professionalism. Every time you talk runway clearances, you need to respond back with your Callsign, Runway and Clearance.

Fun Fact: Abeam the Point of landing’ is a Naval Aviation Term but it has been adopted in Aviations best practices.

Anticipating ATC’s clearances, listening up, and reading back required items are essential to a professional pilot, especially at Montgomery Field. Let’s all get better every flight.

5 Reasons to get your Tailwheel Endorsement (even if you don't plan to fly)

PlusOneTailWheel.jpg

UP YOUR FLYING GAME!

Though it isn’t easy to master these skills, these vintage flying skills enormously help your tricycle gear flying. Between gaining confidence with cross wind corrections in the flare, to a smoother rollout and braking, the improvement makes you a more refined pilot. When you think of a tail wheel aviator, you envision a pilot that is really engaged with crosswind landings.

Supercharge your crosswind skills.

Corrections aren’t that big a deal in a Cessna but are mandatory in a tail dragger. Practice makes perfect and you can make super smooth landings with those skills in your tricycle gear aircraft and impress your examiners or passengers.

Refine your pitch and touchdown finesse.

Bouncing makes landings tougher in a tail dragger, your Tailwheel instructor with make you learn to own the concrete about an inch of the runway so you can smoothly grease your landings.

Build overall confidence in your landings, which makes them all more fun.

You do better when you are having fun right? Tail dragger pilots are always seen refining their landings because practice becomes super fun. The pilotage becomes an art.

Doors open for you to fly unique aircraft.

Aerobatic planes, biplanes, and antique aircraft start to become available for you to fly with increased tail wheel experience. You will find colleagues flying these aircraft and they love to share the aviation experience. If you are a good like-able person, many of these pilots will invite you to more tail dragger activities.

Be part of the tail dragger clique.

You can own a small swagger in your step when you build that Tailwheel time and get a bunch of tail dragger and vintage aircraft in your logbook. You can sit and learn from stories from these old timer tail wheel instructors, they will be gone before we know it.

The Forces - Tail Wheel Wars

Xwingfighter.jpg
a Great Lakes Tailwheel

a Great Lakes Tailwheel

A long long time ago in an office far far away, aeronautical engineers decided that a nose gear would drastically reduce the numbers of ground accidents for aircraft. The forces that cause a tail dragger to swerve, nose over or ground loop would be quickly eliminated and airplanes would spend less time with costly repairs.

Flying a tail dragger, the classic design, is a major machismo in the pilot community. This pilot has mastered the basics of flying, but also the classic arts of aviation. YES, it is an art in every sense of the word. Click here for more of this art info.

A Tail Dragger should not be frightening, but respected. With the Tail Dragger endorsements comes an inherent confidence that you are an above average pilot. Today, the average pilot doesn’t have their tail wheel endorsement, roughly only 5% of the new pilots get this training at all. Some many never get more than the initial training and never become competent.

What are these frightening forces at work? Simply put, the plane is slightly unstable and wants to swivel around tail forward upon landing. Just like that grocery cart you push around that doesn’t like to be pushed backwards. For an airplane this action is described as a nose over or a ground loop. Same concept, yet different causes.

The Ground Loop is easily managed by keeping the longitudinal axis straight down the runway throughout the landing evolution. If the airplane lands with a side load or in a crab, it will start a oscillating swerve going down the runway that may be difficult to control. A gust may also cause this swerving tendency. Swerving moments are natural in the tail wheel aircraft. P- Factor, Slipstream Effects, Gyroscopic effects and crosswinds are powerful forces you need to manage successfully for Tailwheel operation. Find out more about these forces here: P-Factor, Slipstream , Gyroscopic effects. Learning to use those rudders to keep the plane straight down the runway, in all conditions is vital.

The Noseover is a sneaky scenario that happens with these forward CG aircraft. With the CG of the aircraft farther forward, a sudden stop from brake application, stuck brakes or a pot hole can cause the tail to come up and the nose or prop blade to hit the dirt. When this happens, the aircraft may require a new propellor, engine inspection and aircraft inspection. I have seen this happen when a pilot hit the brakes hard in a panic when thinking someone has stopped ahead of him, during a ground loop where the brakes were applied, or in the case of a locked brake on landing. Be careful with every brake application you make, keep them serviced, be controlled with their use and try not to use the sparingly. For some videos of nose overs click here.

Flying the San Diego Bay Tour: Tricks and Tips

San Diego Bay Tour - Know your stuff!

San Diego Bay Tour - Know your stuff!

This aerial flight route over downtown San Diego and the Bay could be called the Taxiway Delta Transition but do not use phrase San Diego Bay Tour to the controllers. The flight could be the finest scenic flight route in the world. I write this article to help you do a good job flying it and not messing it up for the rest of us. Lindbergh Tower is very supportive to the pilots that sound and act professional.


At Montgomery Field, I suggest letting Ground Control know you are planning on the Taxiway Delta Transition when you call for taxi. They will confirm if some traffic restrictions or TFRs are in effect. At times, there may be military activities at North Island Naval Air Station that prevent these flights. MYF Ground may give you a discreet Transponder code during your taxi, and will help coordinate with Lindbergh Tower. Lindbergh gives a 02xx transponder code. When you call up Lindbergh Tower, use the specific ‘Taxi Way Delta’ transition, there is no such procedure as the Bay Tour. This Bay Tour just adds more time for the controller to verify what the pilot truly requests.

You can do the ‘Taxi Way Delta’ two different ways from MYF, but for simplicity, we will discuss the most straightforward path. On checkin with MYF Tower at the runway, remind them that you are doing the ‘Taxiway Delta Transition’ on departure. This ‘heads up’ lets the MYF Twr Controller look for anyone coming east that may be a traffic concern. After takeoff, MYF Twr will clear you towards Mission Bay VOR when all the traffic conflicts have been clarified. Climb to 1500 feet and call up Lindbergh Tower after Montgomery Tower hands you off.


Example Communications for the Taxiway Delta Transition

Pilot:
Lindbergh Tower, Great Lakes 3617L, 1,500ft, 2 miles NE of the Mission Bay VOR for the Taxiway Delta transition.

Tower: Great Lakes 3617L, sqwk 02xx and Ident.

Pilot: Copy, 17L, Sqwk 02xx and ident.

Tower: Great Lakes 3617L, Ident observed 2 miles NE of Mission Bay VOR, cleared through the Bravo at or above 1,500ft, overfly Taxiway Delta.

Pilot: Roger, 17L, Cleared through the Delta at 1,500ft.

Tower may clear you at 1,000ft depending on the ceiling or air traffic. If Tower isn’t able to answer you right away, plan to circle north of Mission Bay VOR, 5-10 minutes should clear things up. At all times, be careful of traffic coming eastbound at 1,400 from Crystal Pier, inbound traffic returns back to MYF from that direction.

When cleared in for Taxiway Delta, fly directly over MZB VOR and fly a heading at 1500 that takes you directly over the Lindbergh cross runway towards the Coronado Bay Bridge and over downtown. If you can’t see it for some reason, it is just left of the tower and it points towards downtown. The Taxi Way DELTA has some DHL or Cargo Aircraft parked nearby.


At some point, Tower may ask your intentions south of the field. Be prepared to say something like this: “A 180 at the Bridge, through the channel and northbound shoreline around PT Loma.” This consideration just gives them situational awareness for when they hand you over to North Island TWR. Sometimes a Police Helicopter may be orbiting over downtown, a Navy Helo maybe in the channel 600ft and below or a banner tow maybe flying an orbit.

During the trek across Lindbergh Tower’s airspace, the controllers like you to report seeing the arriving traffic or final or departure. They want you to get eyes on and report : (Saying IMMEDIATELY that you will ‘maintain visual separation’ drastically reduces two way comm’s and Tower’s workload)

Tower: 17L, Boeing 737 on a 7 mile final for RWY 27, please advise in sight.
Pilot: 17L, has the traffic in sight and will maintain visual separation.
Tower: Approved.

When over downtown, heading towards the Coronado Bay Bridge, Lindbergh tower will hand you over to North ‘Island tower’. (135.1)

Tower: 17L, in 1 mile, you will leave class Bravo airspace, squawk 1200, and contact ‘Island Tower’, 135.1.

Pilot: 17L, Wilco, thank you.

Keep the current flight path towards the bay bridge, try not to deviate in any way towards Lindbergh’s final. Aim for the middle of the bay. Switch up Island Tower and check in. Remember it is a military Delta airspace so the controllers are working both UHF frequencies for the military aircraft, there may be a delay in comm’s. Island Tower transmits on both UHF/VHF but you may only hear the transit on UHF, so try not to step on them when you can’t hear the response.

If there is a holiday, Island Tower may be closed. In this case, proceed and just stay with Lindbergh, call them up again around PT Loma for the northbound turn.


Pilot: Island Tower, Great Lakes 3617L, 1,500 feet south of the Delta, VFR Request.

Island Tower: 17L, Radar Contact, go ahead request.

Pilot: Request to fly south in the bay, 1-3 miles, do a 180, transition south west in the channel, around Point Loma then North bound along the shoreline.

Island Tower: 17L, report your 180, cleared through the Bravo, make your transition at 800 ft, report Point Loma. (they need to clear you through the Bravo again, just west of the Coronado Bay Bridge. Pilot: Read back clearance.

There may be helicopters in the channel that Island Tower points out to you. Call them in sight when you see them, and tell Island Tower you will maintain ‘visual separation’. Someone may be coming in for the channel transition ( in the opposite direction), Island Tower will put you on separate altitudes. Just help Twr out by calling traffic in sight when able, and maintaining visual separation.

Try to fly in the middle of the channel and avoid overflying naval ships.


When you are approaching the turn around the tip of PT Loma, call Island Tower. Pilot: Island Tower, 17L, approaching the tip of PT Loma, request to descend (500ft) and contact Lindbergh Tower.

Island Tower: 17L, cleared to switch to Lindbergh, altitude your discretion.

As you are rounding the tip of Point Loma, heading Northbound along the shoreline, switch up Lindbergh and listen for a good time to check in without interruption airline ops. Make sure you don’t go much further north than Fort Rosecrans cemetery without a clearance.

Pilot: Lindbergh Tower, Great Lakes 17L, south of Fort Rosecrans at 500ft, request northbound shoreline transition.

Lindbergh Tower: 17L, cleared the Bravo at or below 500ft, report Crystal Pier.

Pilot: repeat back clearance. Crystal Pier is the second pier you will come across northbound, the first one is Ocean Beach or OB Pier.

Sometimes an aircraft maybe coming through for a bay tour from Crystal Pier, Lindbergh Tower will not clear 2 aircraft in that area unless they have each other in sight and are maintaining visual separation.

Once cleared through the bravo, fly northbound along the shoreline, maintain a minimum of 500ft lateral distance from any person, pier, or ship. The FAA also talks about flying high enough to make a safe landing.

If you lose your engine suddenly, turn towards the shore and try to land near a boat or surfers. When the fixed gear Great Lakes flips over they may be able to pull you out quickly if you are stunned or unconscious.

Don’t flat hat, there is no reason to fly less than 300 ft, birds hang out more frequently at the low altitudes and the seagulls can do great harm to your prop blades.

If ever you have any inclination that the engine isn’t running normally, do your procedures and head home in the most direct route. Both North Island and Lindbergh Field are great emergency diverts and are helpful to assist if you need to go direct back to MYF. They can clear you through their airspace immediately. Don’t be scared to fess up your fears, we are all a team out there. In the past, a Stearman had to land on a road on the cliff of Point Loma, and a Travel Air landed reverse direction at Lindbergh Field when his engine was running rough. Be smart.

When you reach Crystal Pier, report the pier to Lindbergh Tower when you find a break in their radio comms. You can report it a little early if you hear a break. Try not to interrupt them. Good manners and professionalism keep this tour route open to the professional aviators.

When you check out with Lindbergh Tower, thank them, they may give you traffic calls as a courtesy. Radar and ADS-B targets may be flying low around La Jolla. These may be aerial tour operators such as low flying helo’s or another aircraft entering that shoreline transition from the North.

Be on your game during this tour route, we want continued permission for years to come. Thank you for reading. Feel free to email me with Questions.


The Window Landing Technique

WindowTechnique.jpg

Setting up for a good landing is the most important task you can accomplish in the pattern. Hitting a 200 ft window along the glide path so you are at 85 knots and idle power makes for a very consistent guide for standardizing your landings. Whether you make a short approach from abeam the point of landing on downwind or a long drawn out final, this technique works great for getting the most out of your touch and go sessions. Let me explain.

Keeping a consistent pattern, with abeam distance and altitude, allows a Tailwheel pilot to focus on the touchdown and roll out. The meat of tail dragging. Don’t let the student pilot in a Cessna up ahead of you cause you to change your pattern. Practice your pattern, not the pattern given to you by the pilot in the plane ahead of you.

A Navy Seal training motto, “ if you ain’t cheating, you ain’t trying”. I apply that concept to my Tail Dragger landings. If you can make landings easier by setting yourself up for success then ABSOLUTELY do it. Hit that 200 ft window on final at the same place every time at 85kts and power idle. Come in a little high and slip down to that perfect target window.

Why does this window make your landings more consistent and precise? This technique throws the Slipstream Effect, P-factor and Gyroscopic Effect out entirely, you don’t have to worry about them at all! With power to idle, these aerodynamic forces are fairly stabilized and all you need to work about is cross wind corrections and a smooth consistent decelerating round out. Get good at the stabilized power off glide slope with a gentle deceleration into the 3point attitude and you will consistently grease your landings.

Another critical benefit of this landing style is that you are ALWAYS prepared for that unexpected true power off landing. Land this Great Lakes in a pinch on a small patch of road or golf course without a scratch. Be the hero.